I built an AM5 PC for Python-related things
16 cores, 128 GB of RAM, an RTX 3090. Sounds great but… don’t be an early adopter. While I’m pretty stoked about what this new machine lets me accomplish, it was quite painful to get it running.
The idea for this computer got started when I got involved with helping O3DE advertise their Python compatibility. It quickly turned out that not only does the engine not work on macOS, but really that Apple Silicon is not a supported configuration. Since at that time I was already pretty curious about running stable diffusion locally to learn more about it, I decided to build a computer!
The idea was simple: get a system with a basic RTX card, like an 3060 Ti, maybe 32 GB RAM, and some multicore AMD CPU. However, when I asked about it on Mastodon, I quickly got answers that for machine learning a GPU with less than 16 GB RAM is not very useful. There is a large gap between memory sizes in RTXs: there are 3060 editions with 12 GB RAM but 3060 Ti, 3070, and 3070 Ti only sport 8 GB RAM. 3080 and 3080 Ti get pretty expensive and still only come with 12 GB RAM. The next in line, the RTX 3090, suddenly jumps all the way to 24 GB RAM. Wow.
Now that 4090 is out, though, it turned out that 3090 can be bought below $1000 so I got that. But now, having a 3090, you can’t have a CPU that will be a bottleneck. Plus, the new AM5 platform came out so I couldn’t make myself invest in the now outdated AM4. When I saw how expensive the motherboards are for AM5, I decided to max out the platform: get the 16-core CPU and get as much RAM as the platform will take: 128 GB. Why? Because at this point I could set the computer up to do more than just machine learning and O3DE. I’ll get to that but first let’s build it.
Specs
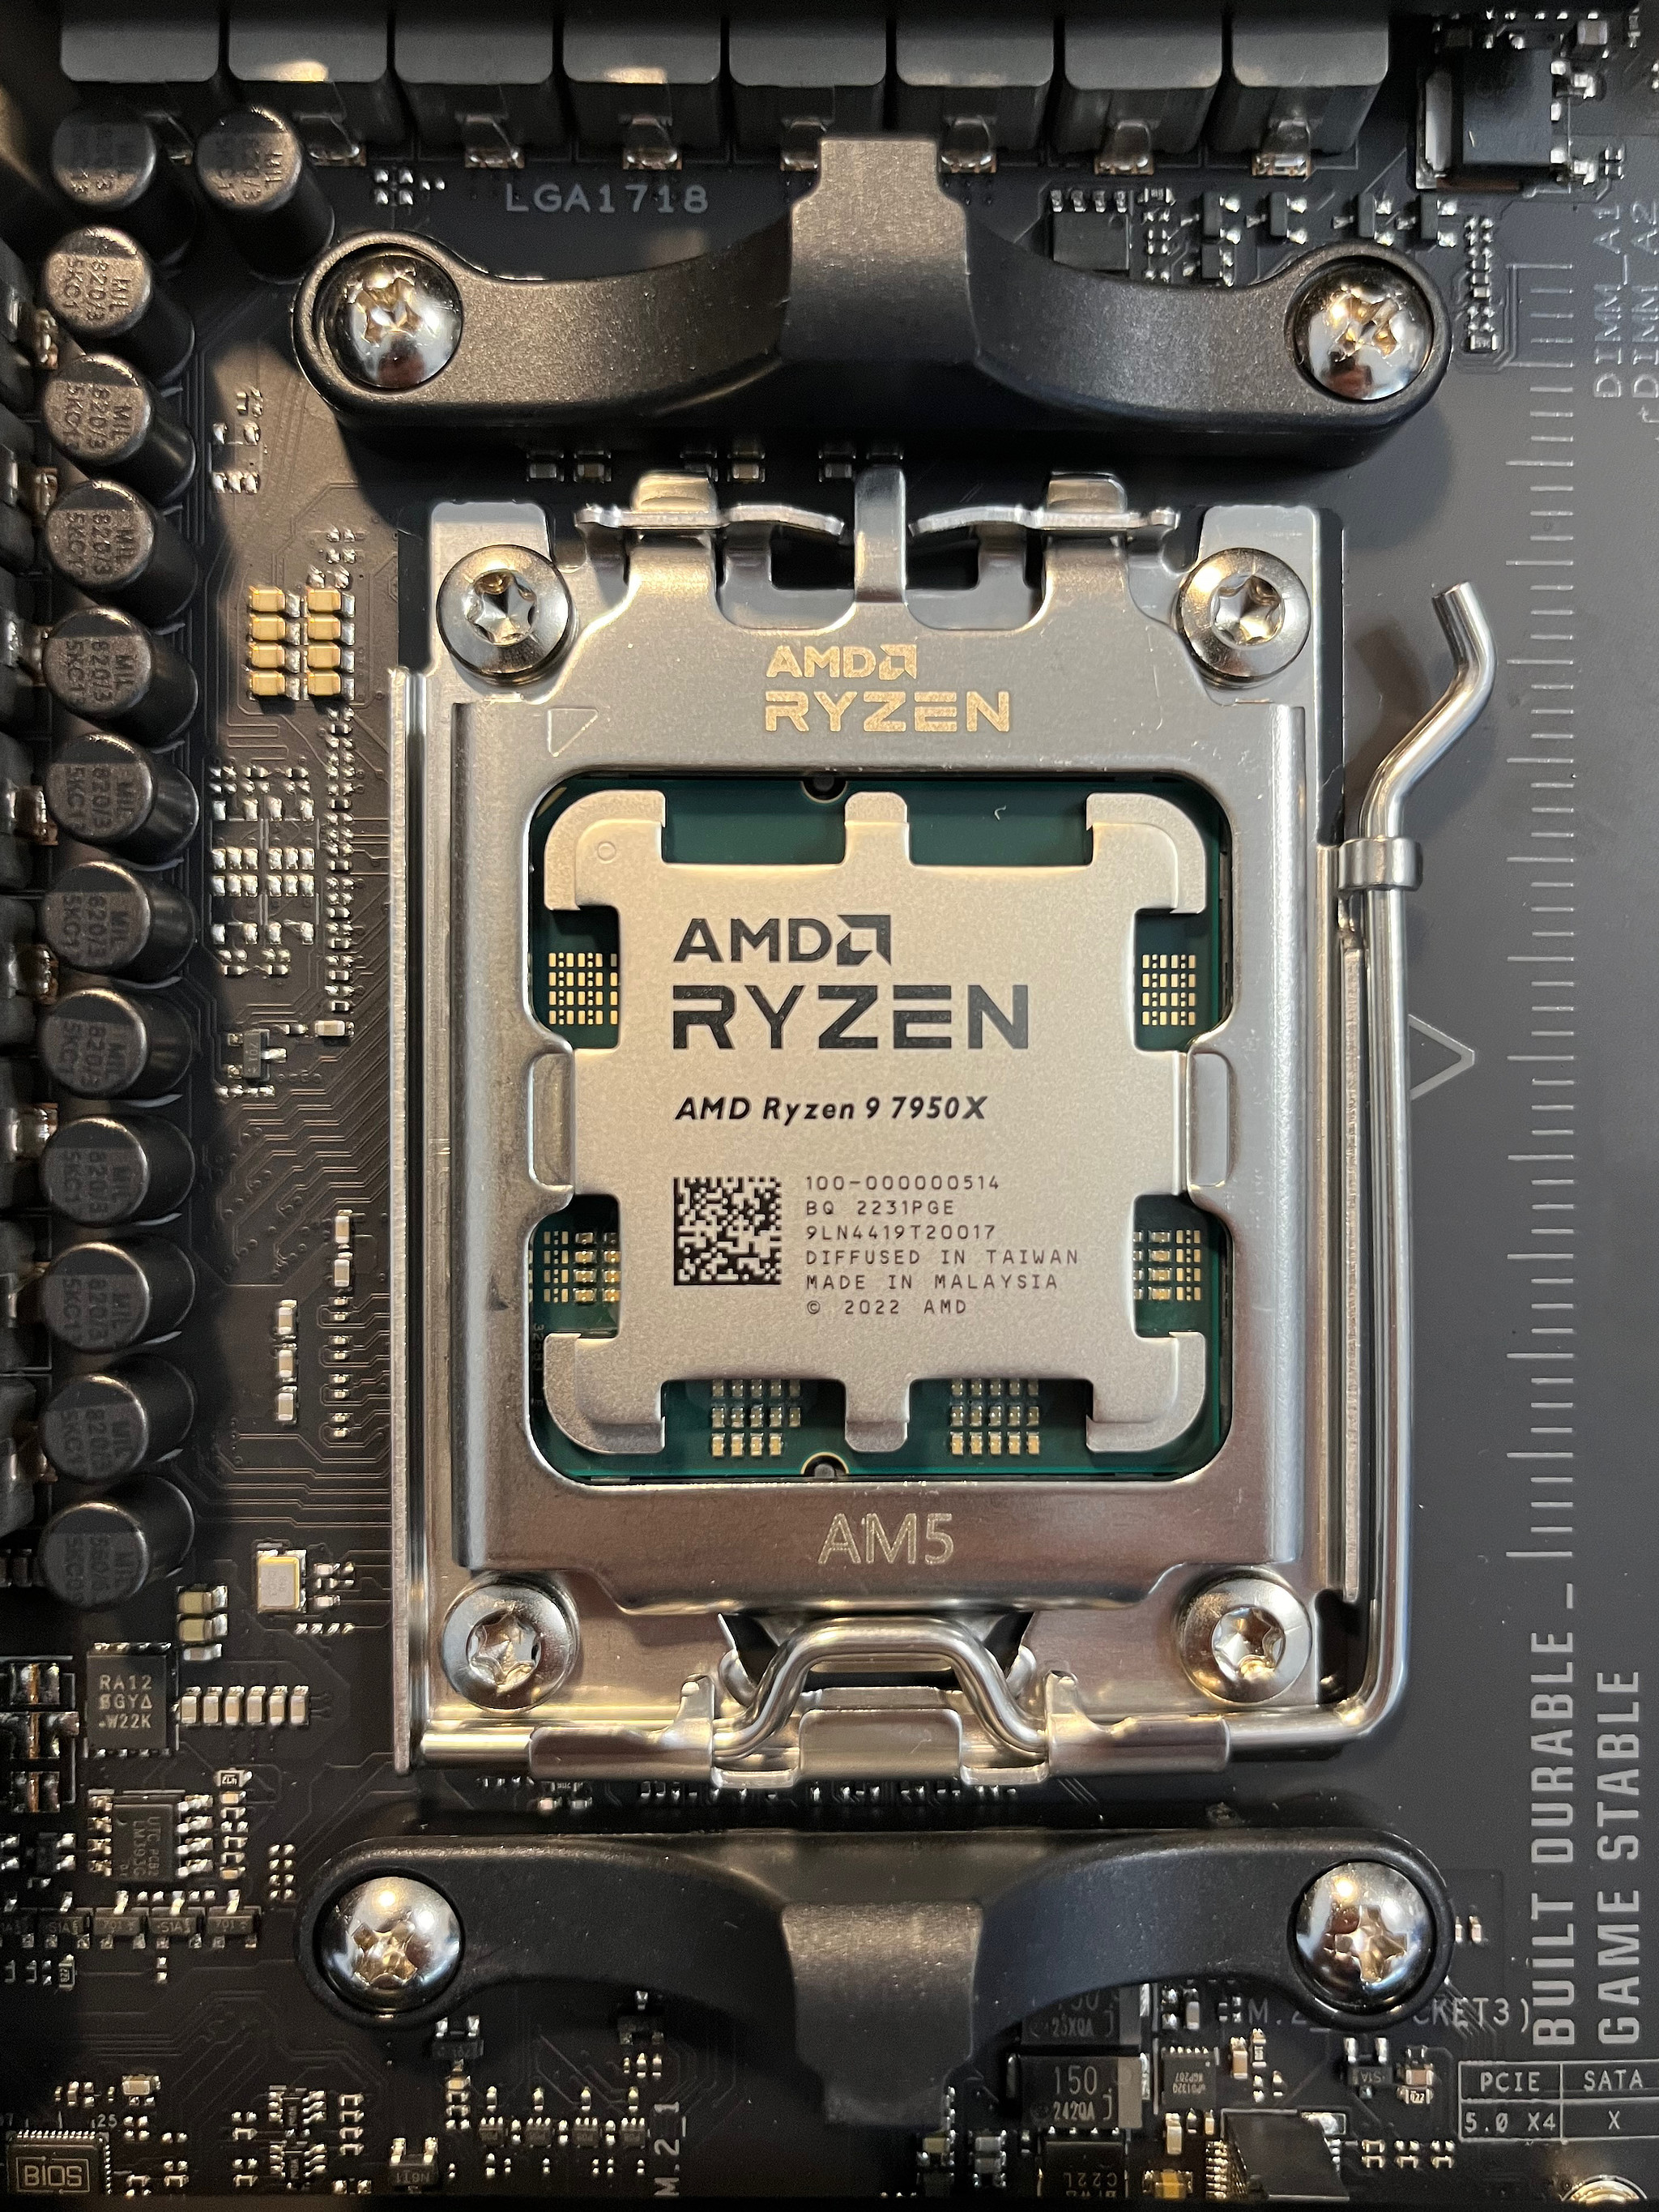
- CPU: 16-core AMD Ryzen™ 9 7950X
- Motherboard: ASUS TUF X670E-PLUS WIFI
- RAM: 4X 32GB Kingston Fury Beast RGB 5600MHz DDR5 CL40 DIMM
- GPU: ASUS TUF GeForce RTX™ 3090 OC
- Storage: 2X Samsung 980 Pro 1TB
- Case: ASUS TUF GT301
- CPU cooling: ASUS TUF LC 240 ARGB
- PSU: Cooler Master MWE Gold 1250 V2
The build
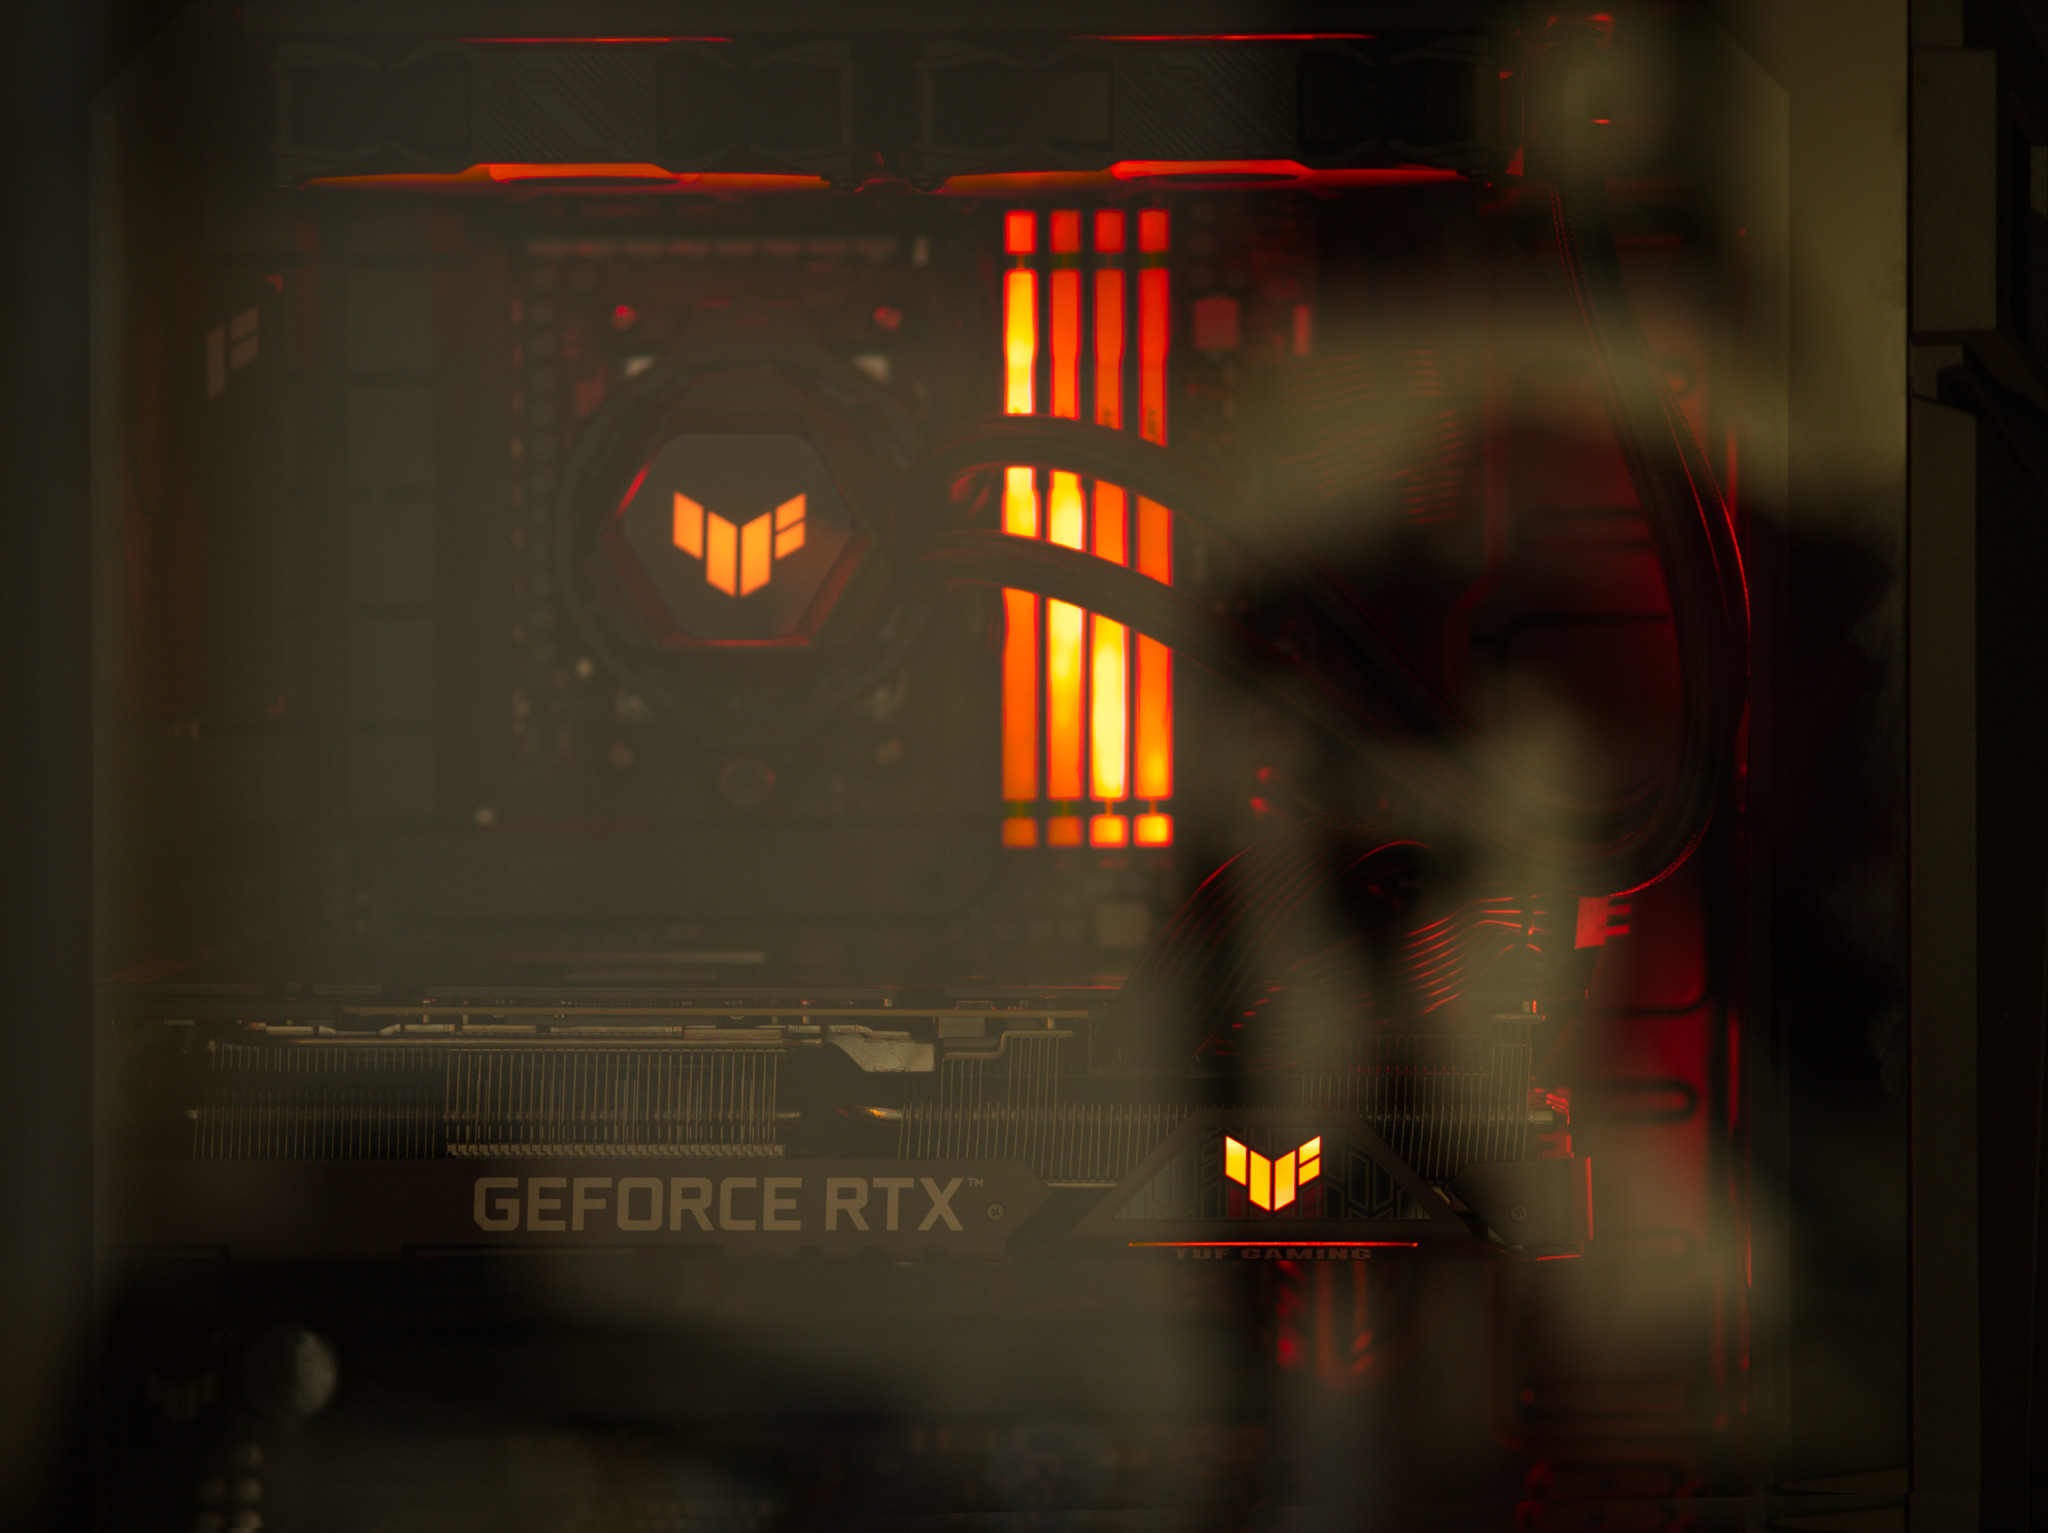
I thought that going for an “all ASUS” setup will ensure everything will fit and go smoothly. Wrong. Sure, it’s nice that you can see the same logo on the case, CPU AIO, the graphics card, and the motherboard, but it didn’t end up helping anything.
Physically speaking, mounting a CPU inside an LGA socket somehow felt more risky and delicate compared to the alternative. Fortunately, it worked fine.
Putting the AIO on was surprisingly simple as the plastic brackets you see above are actually hooks that you secure the cooler against. The AIO radiator with fans barely fit the chassis, as you can see on the first picture the RAM DIMMs are slightly obscured by one of the fans. If I need to remove them, I’ll have to first remove the entire AIO. I did that a bunch of times in fact because…
Maxing out the RAM simply does not work
I wasted an entire day on this but it turns out this is a well-known problem with both AM5 as well as with Intel platforms.
You simply cannot clock your RAM at 5600 MT/s when you’re maxing it out (4 x 32GB = 128 GB RAM). In my case 5600 and 5200 simply refused to boot, while 4800 (the super-conservative JEDEC standard!) still produced RAM errors when blasted with random values in parallel by 16 cores, as tested with memtest86 and memtest86+. I settled on running the memory at a measly 4400 MT/s after a frustrating amount of fiddling with reseating the RAM, fiddling with BIOS settings, failing to POST the system, resetting the CMOS battery, changing the BIOS settings again, and so on, and so on. I mean, 4600 MT/s also worked but I decided to leave myself some leeway as the RAM errors I found before were only visible under parallel load.
POST at boot time still took around a minute for me, which was because of the combination of a 16-core 7950X with the maximum amount of RAM. This was even mentioned prominently in a review of the 7950X. Fortunately, it turned out there’s an option deep in the BIOS to rectify that: Advanced → AMD CBS → DDR Options → DDR Memory Features → Memory Context Restore. Now reboots are quick as expected.
Did I say “don’t be an early adopter”?
At some point I also upgraded the BIOS… which failed. This is not a good thing to have happen as it might mean a bricked motherboard that you have to then return the seller. Fortunately, the ASUS one has a USB port where you put a FAT32-formatted thumb drive with a file with the right name, you press a magic button, and the motherboard flashes itself… even without a CPU or RAM connected.
But what’s the right name for the file? Each motherboard expects a different filename. ASUS provides a Windows executable called BIOSRenamer.exe to do it. But this machine is supposed to be my Windows box! I sniffed the executable with a hex editor but found nothing interesting. So I thought: it’s probably the BIOS file itself that knows what name it should have. And sure enough:
❯ strings TUF-GAMING-X670E-PLUS-WIFI-ASUS-0809/TUF-GAMING-X670E-PLUS-WIFI-ASUS-0809.CAP | grep -iE "\.cap"
.CAPWFa
The file format is not correct. Ensure that the filename extension is .CAP.
TX670ELW.CAP
TX670ELW.CAP
I renamed the file to be that, put it on a thumb drive, pressed the magic button, and it flashed fine.
Windows 11
At this point I was ready to install the operating system. Why only now? Because the RAM problems made me reset the CMOS battery a few times, and the BIOS update got me nervous. You see, I got two SSDs to set them up as RAID 1. You do that in the BIOS, and then provide Windows with RAID drivers at installation time.
I did that, just like last year. This time though I was installing Windows 11, which didn’t let me install without Internet access as it discovered the Ethernet port. Then it insisted on connecting my Microsoft account. Not a big deal, I did that, having this set up helped in the end. I was surprised, though, as letting the installer download random drivers was against best practice just last year. The installer also required me to dig out a USB mouse as one of the screens late in the game didn’t react to the USB keyboard.
But in the end everything went smoothly, the operating system feels snappy, well integrated, looks beautiful in 4K in high DPI. Best part, I didn’t have to pay for it as being a CPython core developer provides me with a Visual Studio Subscription. Thanks, Microsoft, I really appreciate that. It’s helpful!
Blinkenlights
All I wanted is for the LEDs on the different components to have some consistent look. I think I got it in the end, it was a lot of work though:

I thought I’m being smart and got a case with a built-in ARGB controller. That way you connect the fans and the CPU ARGB cables to the controller, and only the controller to the motherboard. That gives you a button on the case with which you can turn off the LEDs or change their color in unison. Well, not in unison. The motherboard itself has got some RGB LEDs and so does the graphics card. Both are ASUS but the controller doesn’t know about them. And then there’s the RAM which doesn’t synchronize with the others and is around 10 times brighter than the rest. Argh.
ASUS provides a suite of tools under the name Armoury Crate that are supposed to control fans, LED lights, GFX cards, and other motherboard settings. This software is famously bad. It did install for me initially and worked until the first reboot. Then it stopped recognizing any hardware. I uninstalled everything, including looking at the hard drive for leftover files, clearing up left-over services with sc.exe delete ..., etc. etc. I was pretty thorough. The software won’t install again, no idea why. I even tried to install it from a local administrator account in case it’s some permissions issue. No dice. Plenty of people have this issue, nobody knows what to do. Neither does ASUS but it’s such a popular problem they even have a separate tool to debug failed installations.
Fortunately, there’s an open-source tool called simply OpenRGB that allowed me to set up this analog vacuum tube orange hue for all components:
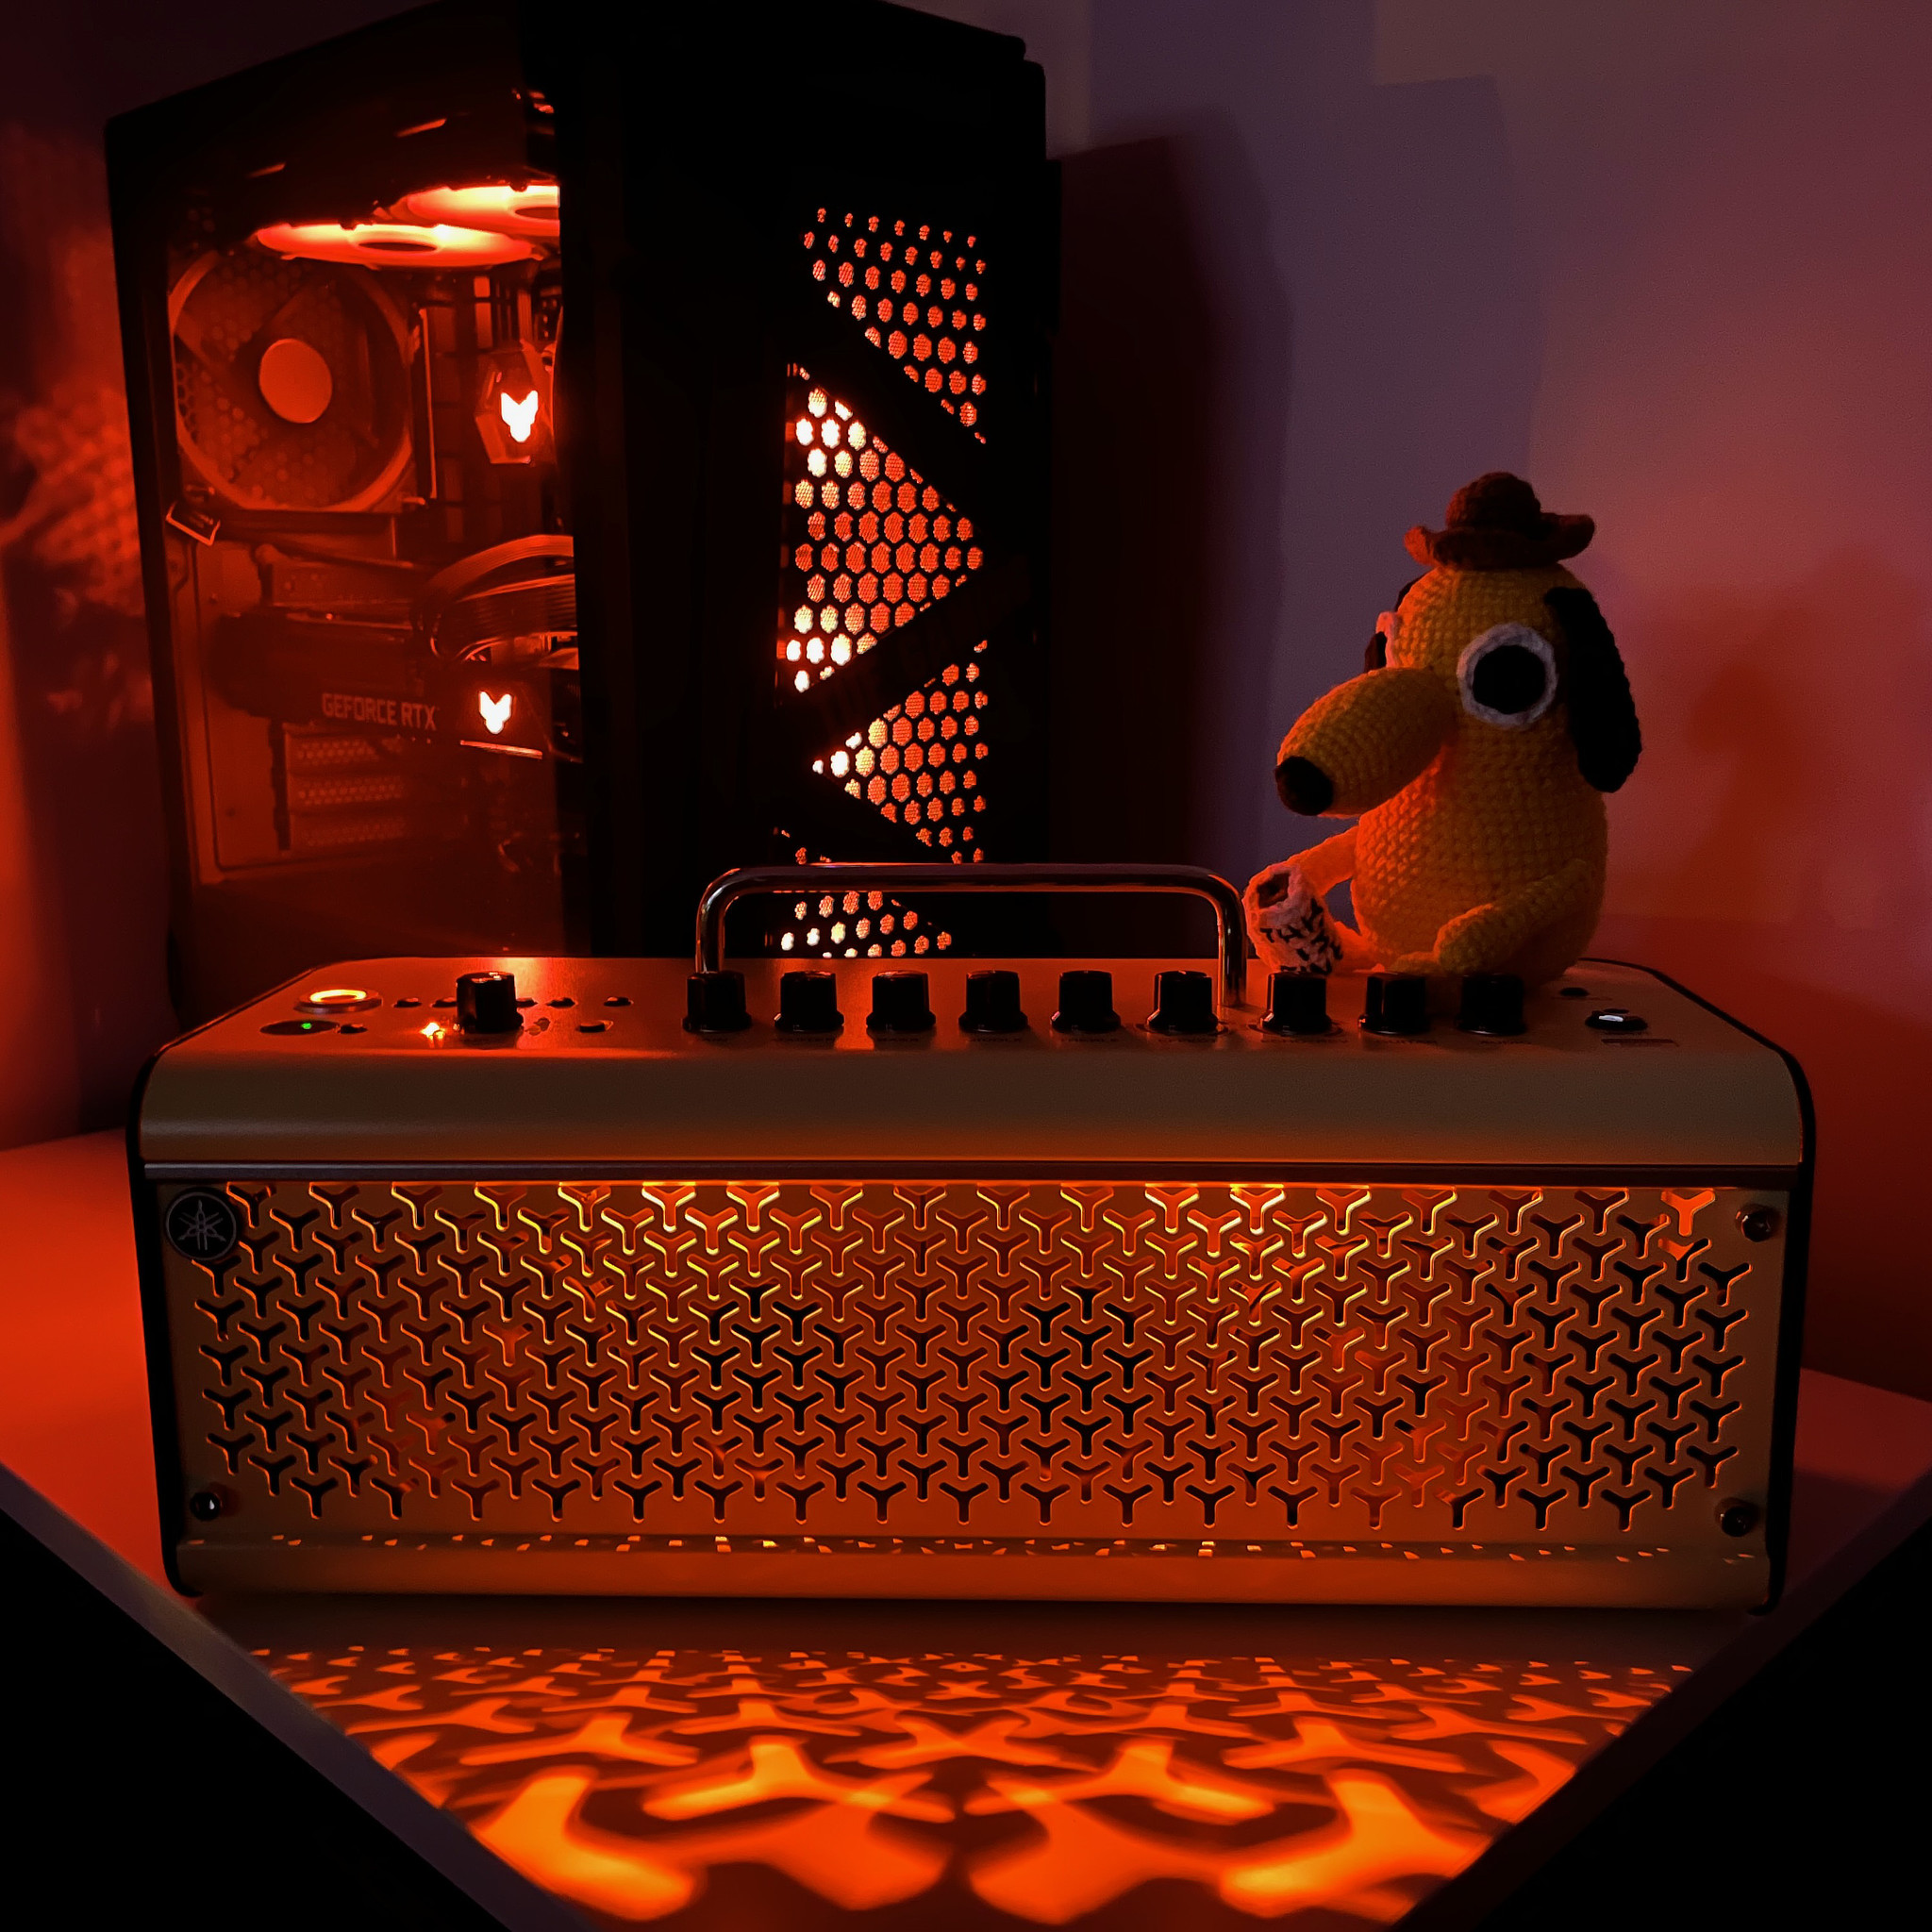
Kingston provided the tool to control the RAM RGB – including dimming them to just 10% their full power – and all’s good now.
Why did I care so much? Well, because I live in Poland where most of my Internet friends will never visit. So I wanted people to be able to see the PC when I’m on a video call. Like that:
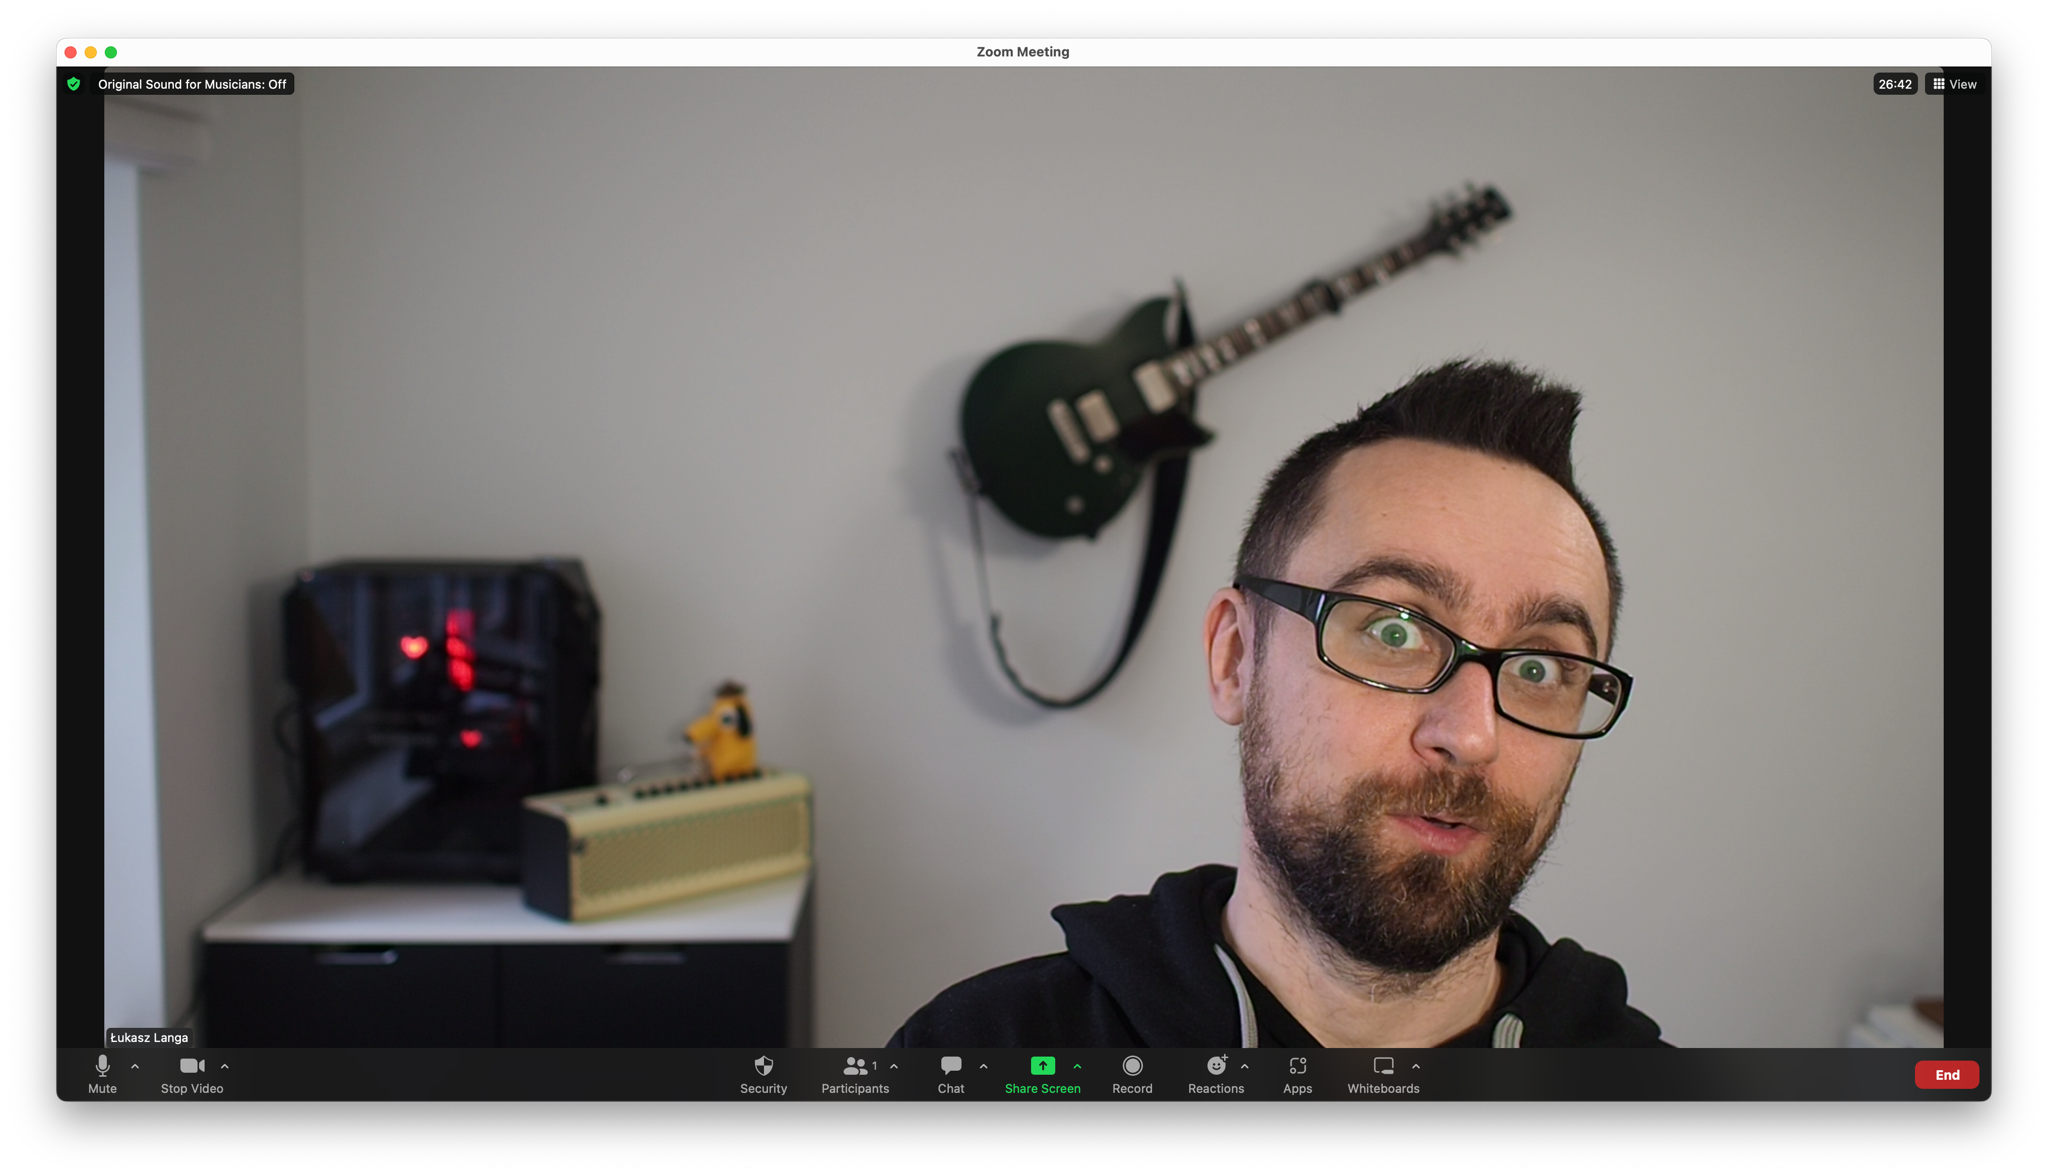
If you’re wondering how the PC can stand all the way back in the room while I’m staring at a monitor 10 meters away, it’s because of the wonder of active optical cables and a nice Bluetooth keyboard and mouse set (Microsoft makes pretty good hardware for a company with “software” literally in the name).
Just a pro-tip: on PC motherboards, the wifi antenna is also used for Bluetooth. So connect it, even if you disabled wifi otherwise.
Alright, enough of that build talk! How fast is it?
I’ve done a bunch of generic benchmarks:
- UserBenchmark says the memory is performing below potential and correctly identifies that XMP should be used in the BIOS. Too bad I couldn’t! At least that same benchmark also fawns over my RAID1 performance. That I like 🥳
- 9,896 points on 3dmark’s "Time Spy Extreme" in 4K
- 12,157 points on 3dmark’s "Fire Strike Ultra" in 4K
- 12,612 points on 3dmark’s "Port Royal"
- 5,075 points on 3dmark’s "Speed Way"
- 15,628 points in 3dmark’s "CPU Profile" with max threads
- 26.47 GB/s in 3dmark’s "PCI Express"
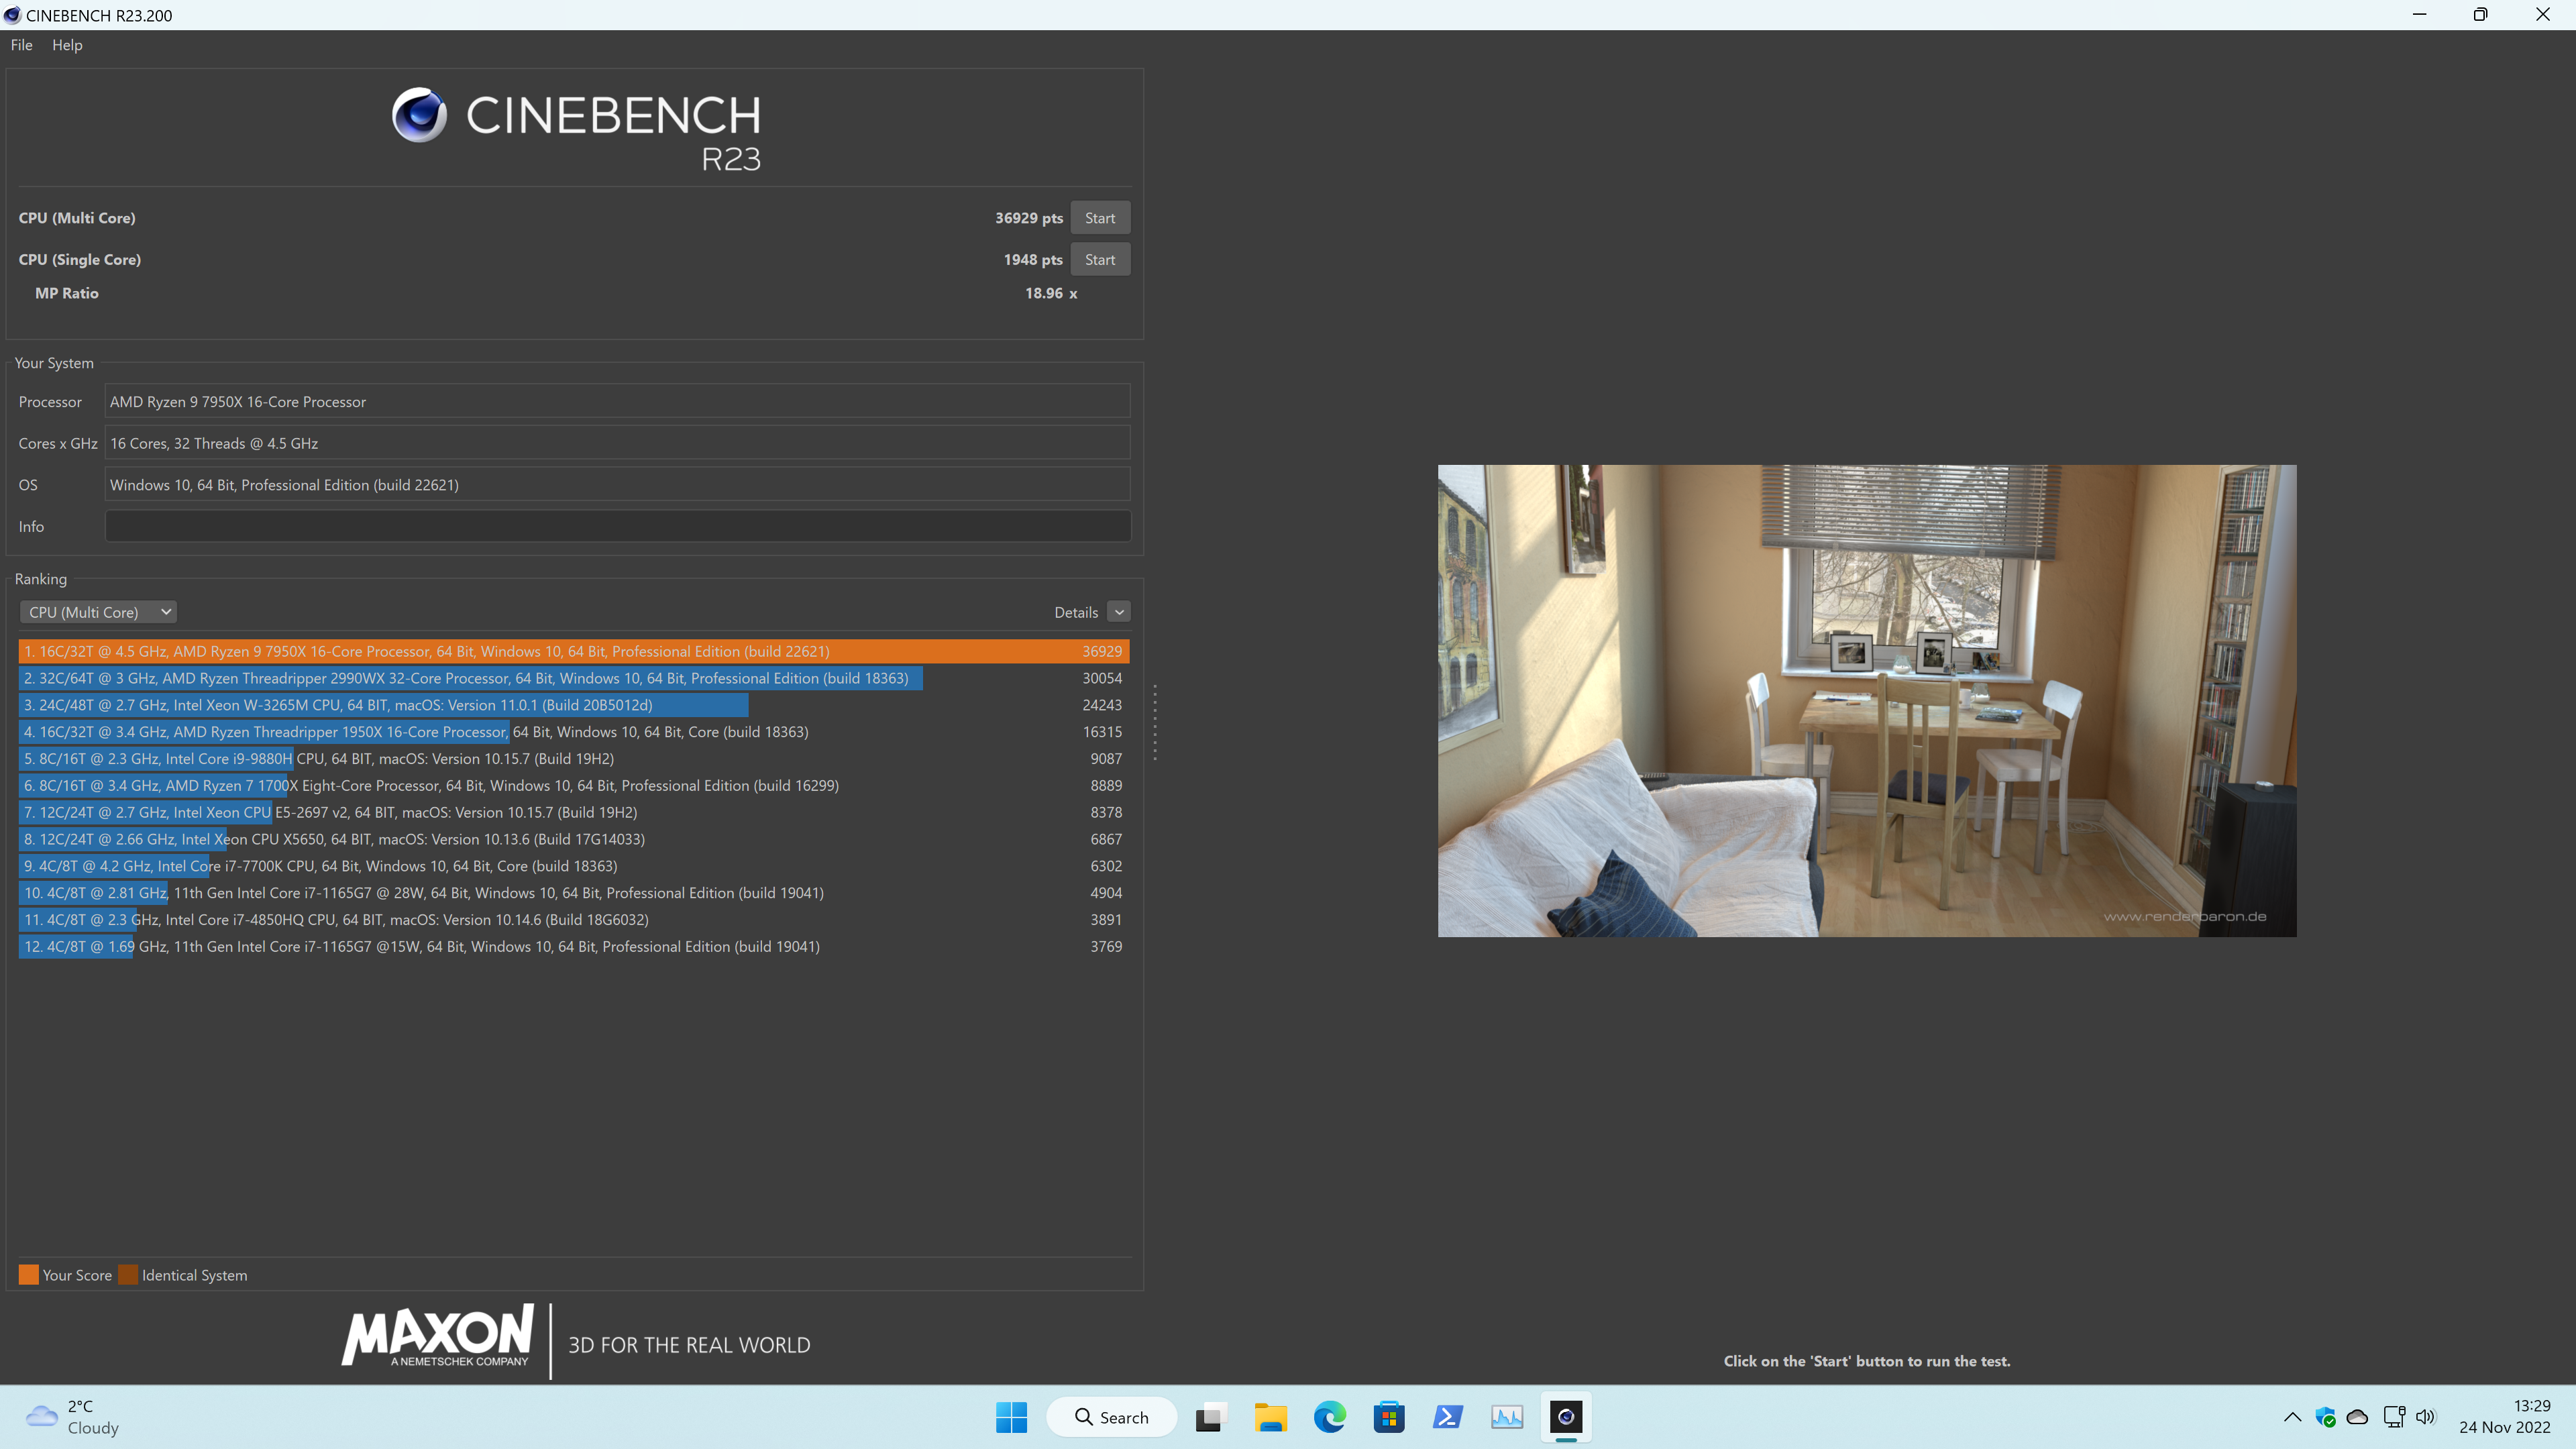
Here’s 36,929 points in Cinebench R23:
Building Python on WSL2 Ubuntu
main a0d940d6acbb
./configuretakes 16.3smake -j32takes 9.5s./python -m test -j32 -ualltakes 2m10s
main from Jun 8 2021 (vs AORUS)
./configuretakes 14.3s (2.3s slower)make -j32takes 11s (11s faster)./python -m test -j32 -ualltakes 2m17s (6s faster)
This last result doesn’t look exactly worth all the extra money but there’s some differences as it turns out WSL 2 on Windows 11 now runs GUI just fine! Yes, the new builds actually exercise tkinter tests of Python. That is amazing!
Moreover, when I looked at the test run, I noticed that out of the entire 2m10s run on latest main, 2m09s was eaten up by just test_concurrent_futures, which is a test that relies on inter-process communication and contains a bunch of load bearing sleep() calls… If I skip this one test case, test -j32 -uall takes only 1m17s. That’s crazy fast for the entire test suite.
The most beautiful CPython buildbot?
Using the computer for machine learning and O3DE is still in the future. But I already put it to use for Python’s benefit: it became our one and only big-memory buildbot. In fact, I used to host a buildbot to run big-memory tests some 10 years back thanks to Allegro, a company I worked for at the time. Since I quit in 2013 and the machine got shut down, CPython hasn’t exercised those tests much. What are they?
Well, they are tests that need at least 2 GB RAM free, and often more, some require at least 20 GB RAM. Many have to do with large memory segments or large blobs of data, like .bz2, LZMA, tests for numeric arrays, and so on. Serhiy Storchaka adapted them to run in low-memory scenarios, too, to keep them from rotting entirely, which happened after my previous bigmem buildbot got decommissioned. However, running bigmem tests with tiny amounts of memory doesn’t really test what we want to test.
So now we’re running a Windows 11 buildbot, which runs as a Hyper-V virtual machine on my Windows 11 host. Yes, that required me to install Windows 11 on Windows 11, and I used a separate activation key for that. But this allows me to keep the machines separate and secure. I could even adjust memory allocation without rebooting the VM. Pretty slick. Here’s how it looks running: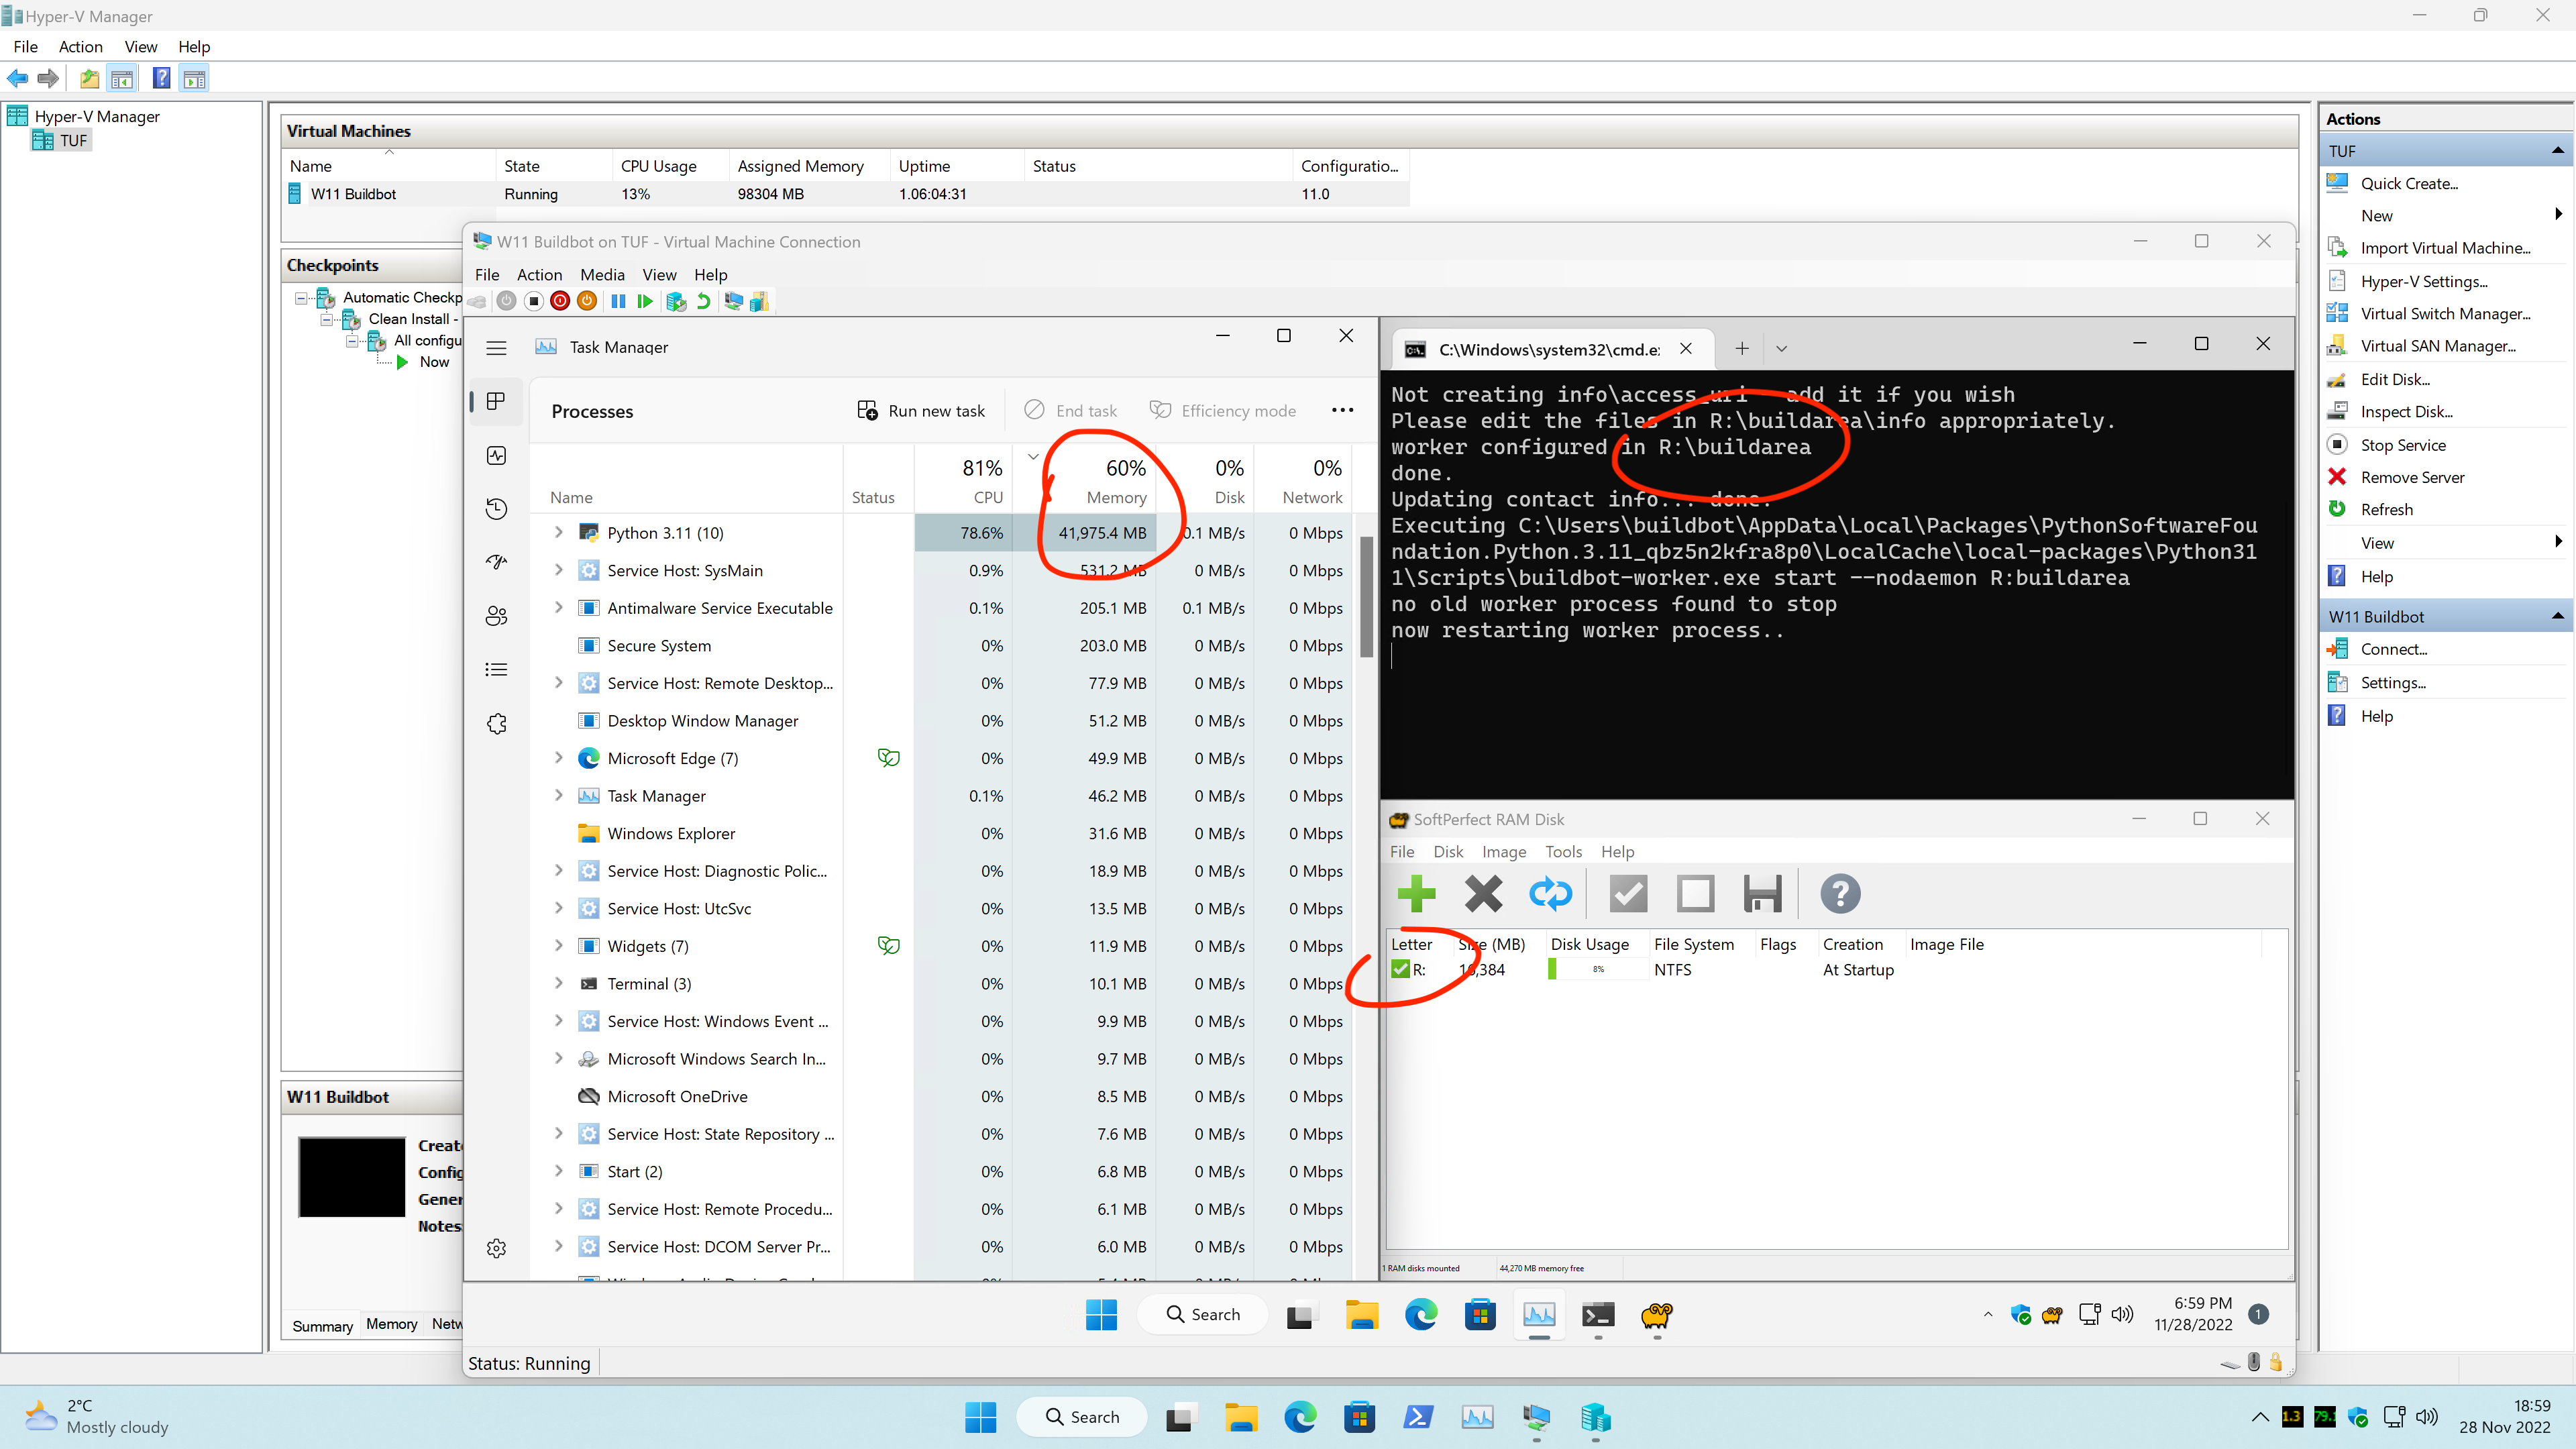
It’s hard to catch a peak point in memory usage on a screenshot. A single buildbot run with the current configuration (a 64-bit Debug build running test -j4 -M24g -uall) takes between 45 and 55 minutes, depending on the random order of tests. I don’t have the patience there to sit for an hour waiting for the right second for the memory to peak in Task Manager. But with over 40 GB RAM used above, we can confidently say that Python should be able to run Slack with no hiccups.
Don’t let “Python 3.11” mislead you here. It’s Python 3.11 from Windows Store running the buildbot worker. And the worker is building the main branch, which will become Python 3.12 in the future.
If you look closely, you’ll see on the screenshot that the build area for the buildbot is kept in RAM as well. That doesn’t really make it any faster on Windows, but allows me to feel like frequent rebuilds and test runs won’t affect the SSDs too much. Sure, to make this perfect I should have rather put the entire virtual machine disk image in a RAM disk on the host but that’s overkill even for me.
Since the buildbot startup script requires R:\ to be available, I didn’t want to overcomplicate things with setting up a Windows service. Instead, I used a feature of the SoftPerfect RAM Disk where it will run a given program when the RAM disks are up after boot. Originally I thought this would only allow .exe files but fortunately .bat files were accepted, too. That way I could run my Python script that:
- recreates the build area if needed as the RAM disk will be empty on every startup;
- fills out my contact information for the worker (which cannot use Unicode characters… story of my life);
- runs the buildbot worker in the foreground.
The batch file then only serves as a poor man’s process supervisor, with this magnificent .bat loop:
:retry
python C:\Users\buildbot\setup_buildbot.py
@timeout /T 10
@goto retry
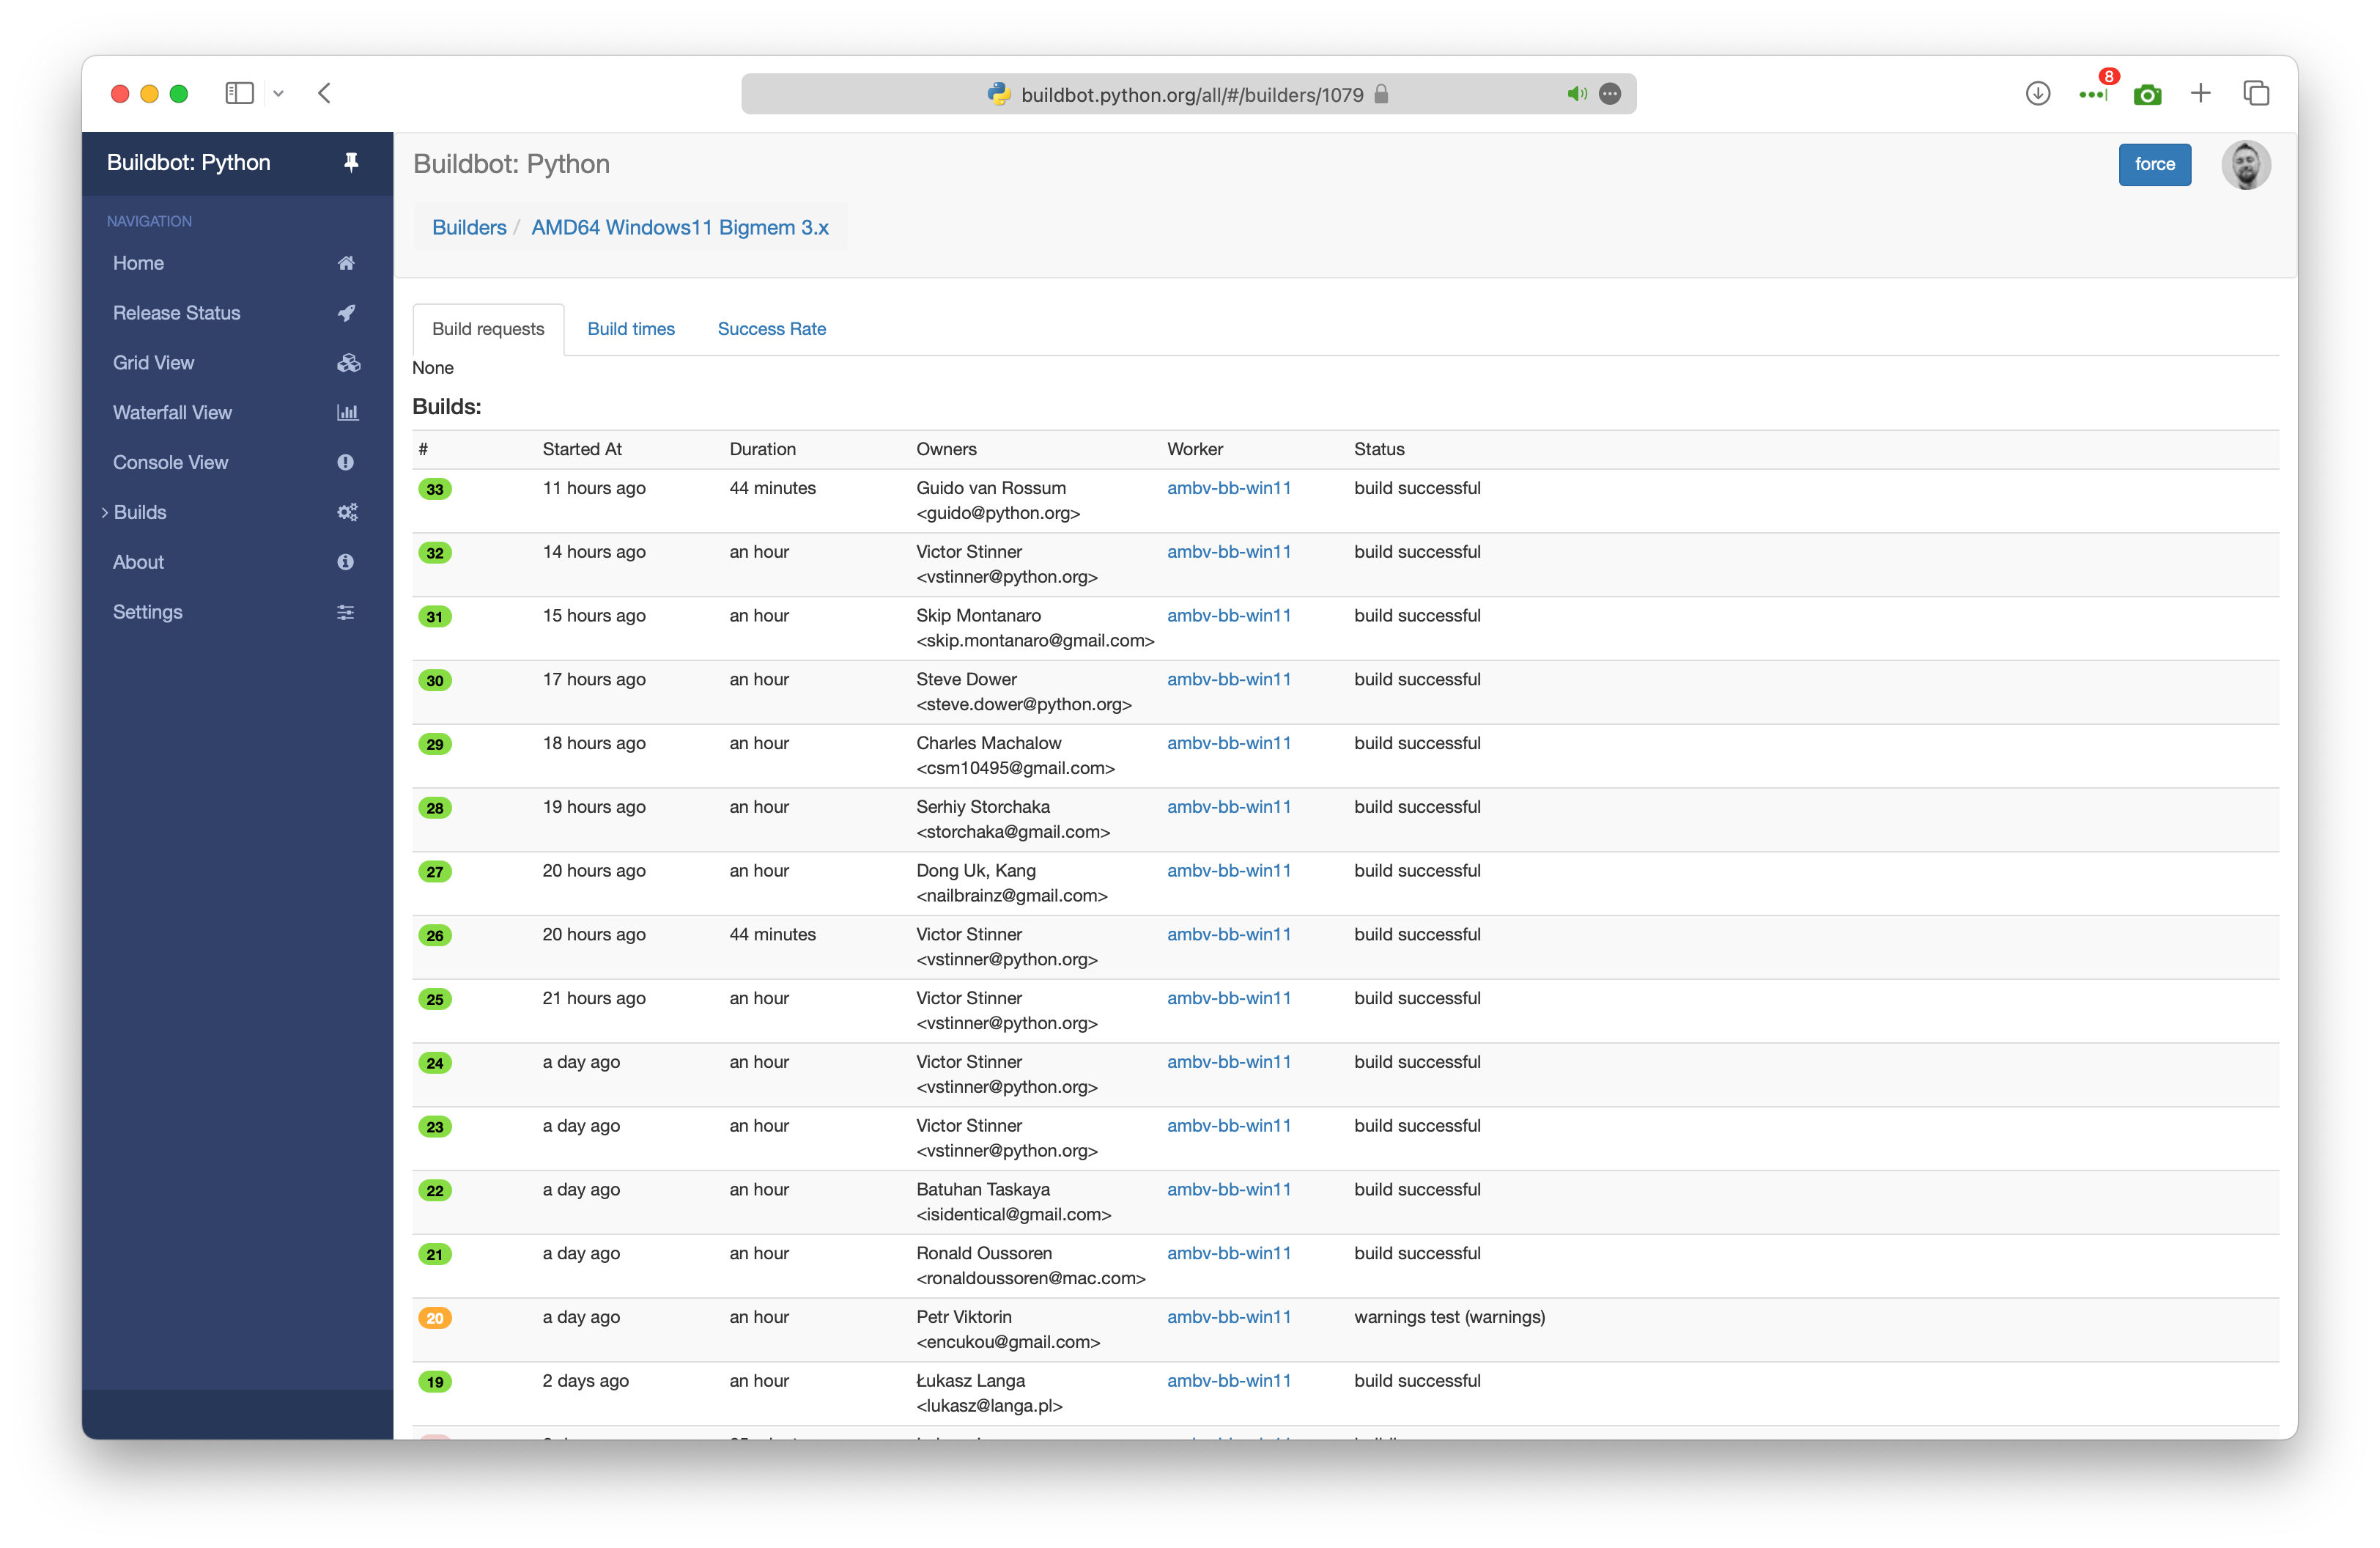
Fabulous. The buildbot’s been running for a while now and is green after I fixed a small bug in big-memory sqlite3 tests:
Noise– less
There’s a lot of fans in this configuration! The graphics card’s got three but they’re mostly turned off unless you’re actively doing something with graphics. The CPU AIO has two nice ones: RGB and PWM-controlled. Then there’s the case…
The case I bought came with four built-in 120mm fans: three at the front with RGB, and one regular black fan at the rear of the case. All of them are regular 3-pin DC voltage controlled fans, not the new fancy PWM-controlled fans. The front fans came pre-connected via daisy chaining to a single cable that is then easy to connect to your motherboard. My advice is to undo the daisy chaining and connect each fan to a separate CHA_FAN header in the motherboard. This allows the motherboard to read the RPM of every fan and so it will be able to spin them slower if the temperature is low. I did that, also with the CPU AIO fans. Fortunately, the motherboard’s got 2 CPU fan headers and 4 chassis fan headers: ideal for this configuration.
Unfortunately, the end result was still pretty noisy. 36dB measured by the Apple Watch at the desk, around 5m away from the chassis. 45dB with the watch next to the front fans, 50dB with it next to the upper CPU fans, and a whopping 60dB at the cheapo rear fan. It got me thinking that I should switch it for a Noctua one. So I did. I also swapped the fan screws both at the rear and at the front of the case with Noctua’s rubber anti-vibration mounts.
All those changes allowed the noise level to fall to 32dB at the desk (39dB at the front fans, 45dB at the upper fans, 40dB at the rear fan). While it doesn’t sound like much, it’s a massive difference in comfort. Before was kind of like having a faucet with running water in the room, now it’s more like having a window in the room open to a field in the middle of nowhere with minimal wind. Sure, the fans are still audible but they are definitely no longer noisy. It’s so quiet in fact that I’m now able to hear the CPU AIO motor. That I won’t be doing anything about, enough is enough.
What’s next?
The machine was built with O3DE and machine learning with mind first and foremost and I intend to put it to this use soon as well. The 3090 got no use at all besides benchmarks so far, and I still have 32 GB RAM available outside of the buildbot for other things. Stay tuned.